Adding a DRO the the quill of my milling machine
Addendum of 12/29/2015
After
having my 12 inch AccuRemote DRO on the shelf for well over a year, I
finally decided to get busy and get it installed so I would have a full
4 axis DRO
system and be able to accurately adjust my quill depth.
I struggled a little with the design, as most installations I have seen partially or totally block the depth stop nuts. I often use the depth stop and did not want to prevent its use. I finally decided to firmly mount the DRO body and let the bar move with the quill. This made a clean installation and left the stop nuts totally exposed.
I made a mounting bracket that used existing bolts plus one new tapped hole to mount the body. I then made an arbor with an expanding end, to securely mount to the moving stop ring. I used a spacer to extend this out to attach to the movable DRO bar.
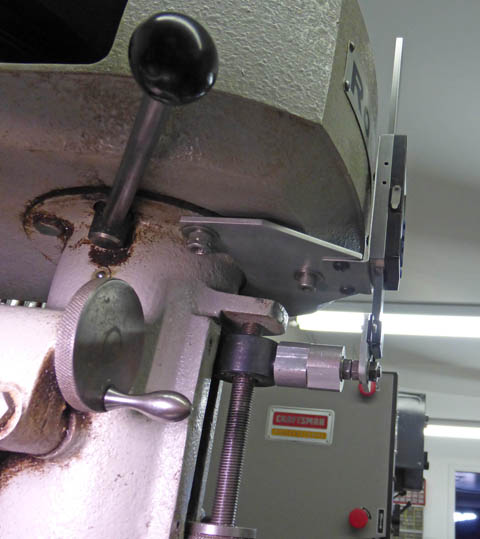
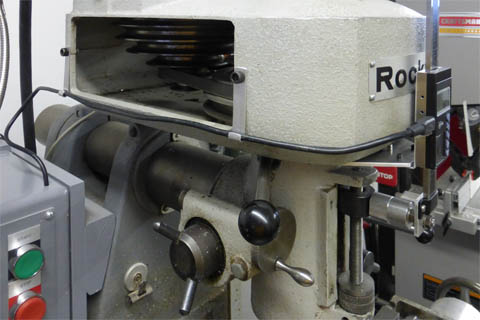
This shows the mounting brackets and the arbor driving the DRO bar. The main bracket
is mounted with two of the original top housing bolts plus a new stabilizing one near the front.
I allowed sufficient clearance on the mounting holes, and adjustable nuts mounting the bar to
accurately align the parts. The main mounting bracket is very stiff, ensuring high accuracy, but
the vertical bracket is quite flexible to allow slight amounts of auto-alignment.
Note from January 2021:
Shortly after posting this mod, I received a comment from a member of
the former Yahoo Rockwell Mill group (it is now groups.io) asking how I
was going to rotate the motor and top housing around the spindle axis
with this DRO in place. The answer of course is that you
cannot! I didn't even realize that was an option until he brought
it up. To install the parts so as to not interfere with the rotation of
the belt housing, the body of the DRO would have to be mounted to the
spindle casting, not the housing bolts. It would also have to extend
out far enough to clear the corners of the belt housing as it is turned. I have
never personally felt a need to rotate the housing, so I have not changed
the mounting of the DRO. If you are planning to do something
similar, you may want to consider it.
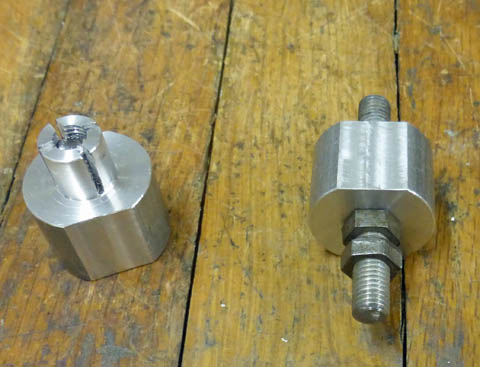
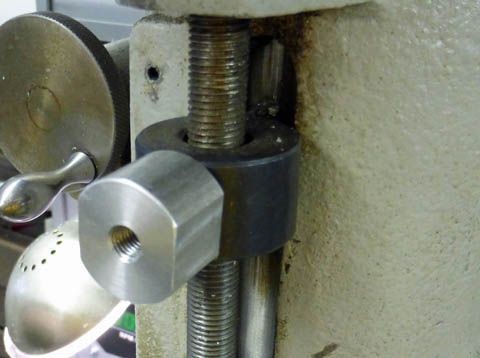
The expanding arbor is a snug fit into the hole on the movable stop ring. An incompletely taper tapped hole allows a setscrew to expand the split
tangs and securely lock it in place. An added spacer is needed to reach the location of the bar. A single part could have been used, but I
have no way to tap a 2 inch deep hole, so I made it in two parts.
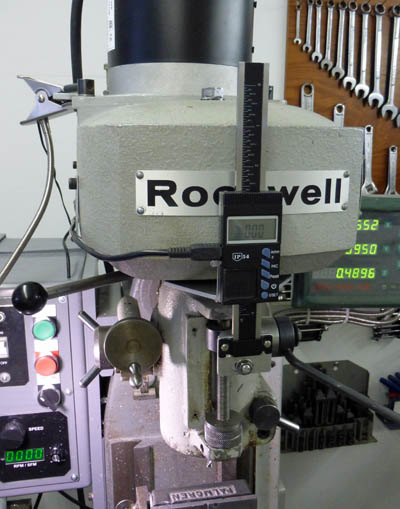
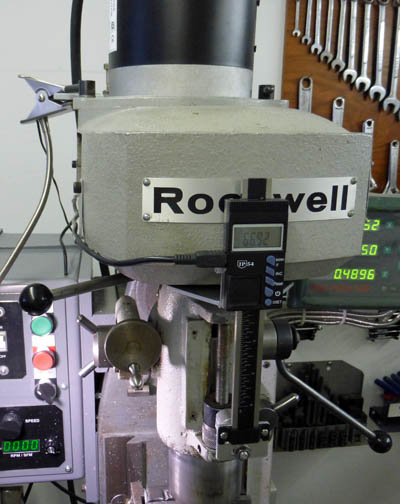
This shows the finished installation with the quill fully up on the left, and fully down on the right. The scale readings above the body
read the same as the original scale on the mill. The digital readout reads to .0005 inches. Note the clear access to the adjustable
down stop nuts with the quill up. The AccuRemote DRO is a beautifully made, all ground stainless steel unit, which is very smooth
in its operation. It is well worth the extra cost over the extruded aluminum/plastic DROs.
As with the lathe DROs, the mini-USB connector on the display carries the 3 volt battery
power on 2 of its 4 wires. This makes it easy to use a pair of AA batteries instead of
the small internal button battery. On my lathe, the DROs have been powered on continuously
for well over 1 1/2 years on the AA batteries. The button batteries died within a month or so.
Here you can see the wire running from the DRO to inside my control box.
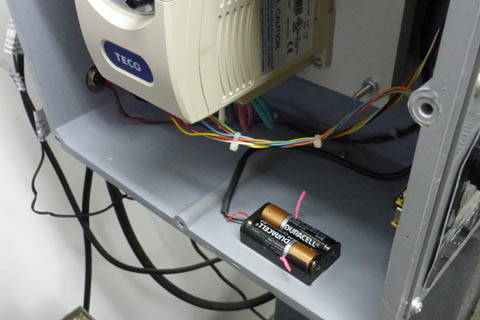
The batteries reside in the control box.
GO BACK TO "Machine Shop Projects"
R. S. Mason
12/29/2015