I Procure Another 3D Printer
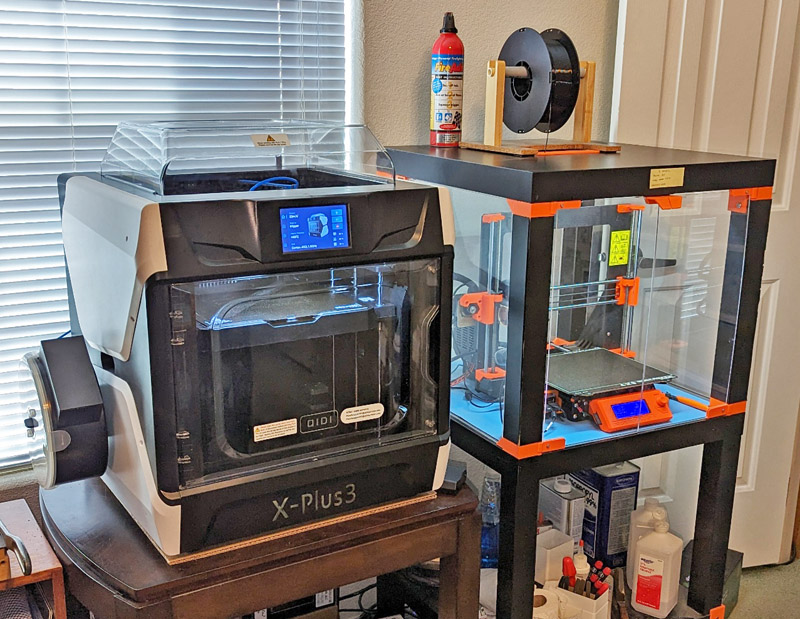
My print farm now consists of two 3D printers, my 5 year old Prusa MK3S on the right and my new Qidi X-Plus 3 on the left
Background:
My 3D printer is now over 5 years old, and a lot has happened in the design of similar machines over that time. About a year ago a Chinese company, Bambu Labs took the market by storm with their new core x-y machine. It is a totally enclosed printer and has an optional 4 reel filament holder which allows intermixing of up to 4 different colors in a single print. It also is capable of printing at insane speeds, up to about 6 times as fast as the typical open frame printers, and contained most all of the available special features for increased monitoring and reliable running. Most all of these could be found on other printers, but never all of them together. Suddenly, Prusa (the brand of my existing printer) was pushed down to 2nd best after many years of being considered the best affordable 3D printer by many knowledgeable sources.
The hobbyist market consists almost exclusively of 2 basic technologies:
- There are the filament printers which use a thin length of plastic filament, very much like weed-whacker line, but much more tightly controlled both physically and chemically. These melt the plastic and push out a very tiny diameter, depositing it just where plastic needs to be, layer by layer, to form the final object.
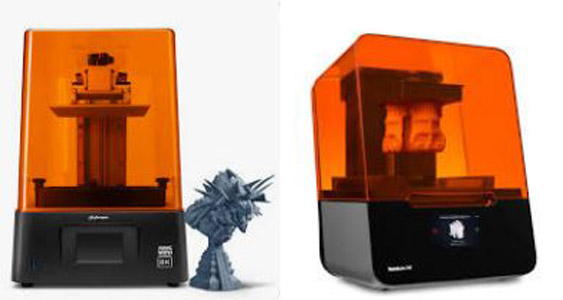
- There are also resin printers which contain a flat tray filled with photo-sensitive resin, and an "upside down" table above it. The table moves up and down. The bottom of the tray is transparent with an LCD screen below it. Again, layer by layer the screen lights up the areas where plastic needs to remain and solidifies it, but doesn't really cure it. The printing table moves up one layer thickness and the process continues. The finished part is hanging down from the table and needs to be thoroughly washed to remove all the non-hardened resin and then to be fully cured using either sunlight or an ultra-violet light source.
- There are the I3 or Rep-Rap printers, colloquially called "bed slingers". My
Prusa is a bed slinger. Up until Bambu Labs came out with their
machines, most of the hobby level (less than about $1000, with many in
the $200+ range)
filament printers had an
open frame which supported the X axis (left and right) and the Z axis
(up and down). Beneath the frame was the bed which moved in the Y
axis
(in and out). It is amazing the quality a good bed slinger can
produce, but they are limited to how fast they can print.
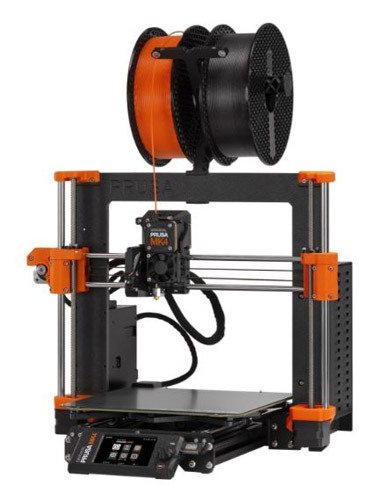
- There are the core x-y machines where the head moves in both the X and the Y directions using a somewhat complicated belt system and requiring both motors to make most moves. This geometry is moving less mass, resulting in the ability to move faster than Rep-Rap machines can. Some configurations move the table up and down to change the Z level while other move the entire X,Y system up and down with the table remaining totally still.
- There
are also delta machine where there are 3 drives, all moving
in the Z direction. From these drives are three links connecting
to
the print head. By moving the tops of these 3 links to different
heights it is possible to move the head anywhere within the printable
volume. These printers can be quite fast due to the low moving
mass, but have a hard time maintaining the best accuracy. Our
discussion will be limited to types 1 and 2.

These are the typical hobbyist types of 3D printers. On the left are a couple of typical bed-slingers, next are core x-y, then the delta printers, and the right are resin printers
My recent actions:
Prusa recently came out with a new model, the MK4, incorporating many advancements over their previous models. They have excellent customer service, and are the only company I have heard of which offers owners of any of their previous machines an upgrade path to the latest design. I have upgraded my printer once and was offered another one. I declined the second as the scope of the upgrade was limited to an area which had not given me any problems, and I did not think it was worth it to me.
They have now offered 3 options of partial to full upgrades for my printer to be modified to the latest configuration. These range from changing just the controller and display to changing everything except the main frame, the power supply and a couple more minor items.
I struggled over the cost and advantage of each upgrade path and also whether I should stay with the Prusa brand or try a Bambu Labs or one of the other brands of newly released look-alikes.
It did not take me long to totally eliminate any consideration of the Bambu Lab line of printers. There were several considerations:
- They used numerous open source elements in their design, but failed to follow the open source licensing which requires that they also offer their improvements as open source for others to use. Their entire final design is held closely to them as proprietary. This has upset many open source proponents, myself included.
- You
cannot connect your personal computer to your Bambu printer
and print directly with with all the features. Instead when you
go through the motions of
doing so, you are really transmitting all your data to the Chinese
controlled servers which then send the information back to your
printer. There are work-arounds with reduced functionality that
you can use, but there is no way to upgrade the firmware of the
printer without using their servers. This means that if a
shop has non-disclosure agreements with any customers, they either cannot
use this printer for those jobs or they cannot update their printer.
- They have had reliability problems, including one where printers started up at night re-printing the last print that was run. If that print was still on the build plate, it was ruined and it was possible to damage the printer.
- Being so dependent on a cloud interface, your abilities are
greatly reduced if their is a problem with their servers or your local
Internet. You also have lost much of your value if the company
should go out of business and shut down their servers.
I also looked at 2 other brands which have come out with somewhat similar core x-y machines as a result of Bambu Labs' success. These are the Creality X1 and the Qidi X-Plus 3. Both these companies make another similar but larger printer and Qidi also offers a smaller one in this line. During my research of other brands I was also considering the pros and cons of either upgrading my present printer or just buying the kit version of the MK4. So much to consider!
My 3 finalists were the Prusa MK4, the Creality K1, and the Qidi X-Plus 3
My decision:
I am very partial to Prusa printers. The company has done a very good job of designing solid, reliable machines. In addition the customer support is the best I have seen in any industry. They have a 24-7 chat line which is manned by knowledgeable people. You can usually solve any problem by using this chat service. As I mentioned before, they support all their customers, not only the new ones. They offer reasonably priced upgrade kits for all their older printers allowing you to bring them up to the configuration of their latest ones. They are also firm believers in the open source concept. Design details for everything they build and all the software they write are available free to anyone. In addition, they provide frequent updates of the firmware for the printer and all the external software such as their slicer- which, due to their open source policy, is the default slicer for many other brands of printers. I am sure sticking with open source has cost them many customers as Prusa clones sprang up in large numbers very quickly after Prusa's design release of their last major upgrade. This seriously undercut Prusa using the exact techniques and processes they developed, but lacking the quality and support Prusa offers. I really wanted to stick with Prusa, but I also wanted to check out the latest breed of printers. Prusa is offering a large core x-y printer with optional automatic tool changers, but it is very expensive and way behind schedule with very long back orders. The primary result of Prusa's open source policy is that the overall technology of 3D printers has advanced at a much faster rate than it would have otherwise. It has been a gift to all 3D printer users!
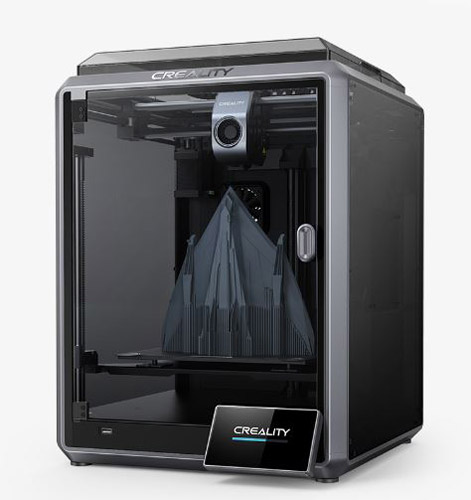
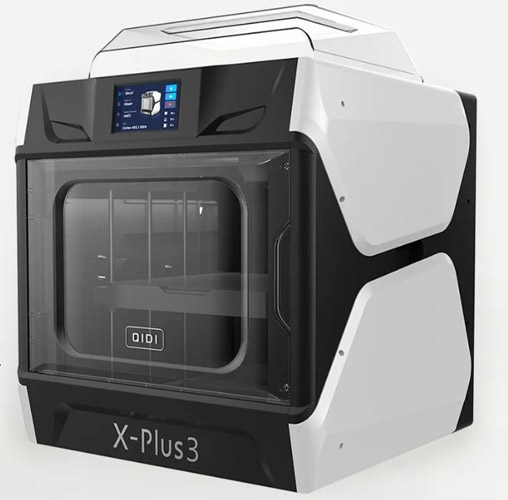
In the end I chose to go with the Qidi (pronounced Cheedy) X-Plus 3 printer. This is a core x-y printer with speeds slightly better than the Bambu, a full enclosure with the ability to control the internal temperature, and a very competitive price. It uses no cloud printing system and can be controlled directly by your computer using either WiFi or an Ethernet wired connection. Their default slicer is a slightly modified copy of the Prusa slicer. It is a Chinese built printer but was warehoused in California. This resulted in only several days between ordering it and receiving it.
This printer model suffered a slow start, with the initial release getting many complaints and poor reviews. Unlike what many companies would have done (nothing!), they halted production and over a several month period made many design changes which resulted in a superb printer. Then they offered the new model to all the original purchasers and told them they could do what they wanted with the original one. That kind of response deserves a lot of respect. Qidi is also known for having excellent customer support as opposed to Bambu Labs and Creality which have reputations for their very poor support. Even though it is the best of these three core XY machines, it is still no comparison to Prusa's excellent support and documentation.
The contest was really between Prusa and Qidi. I chose Qidi primarily because I wanted to experience the newer technology and be able to compare it to what I am already familiar with. It offers some very good features such as a dry-box to hold the filament reel. Some of the more complex materials such as nylon absorb water from the humidity in the air very quickly. This prevents them from printing well, and an open reel can start out totally dry but absorb enough moisture to cause problems just during the time to print the part. The dry-box is completely sealed and has a large package of desiccant included. The filament leaves the box through a teflon tube which carries it to the extruder. It is also alone in the market offering a temperature controlled heated chamber for printing some of the fussier materials. The competition just lets the compartment heat naturally from the heated bed and the extruder with no monitoring or control. It also contains the now pretty much standard features like auto bed leveling, filament-out detectors, power failure recovery, Klipper operating system (more sophisticated than previous Marlin system), and Input Shaping which tests the printer for its resonant frequencies and avoids printing at speeds that generate those frequencies, allowing much higher speeds without degradation, etc.
The quality of the printer looks quite good, but servicing will be difficult, with much poorer access than the open Prusa construction. I am very sure that I will not be offered kits to make major upgrades as time progresses, although I have been offered a couple of reasonably priced accessory upgrades already. I am happy with my decision. My prints from the Qidi are made quickly and look very good.
Meet the Qidi X Plus 3 printer:
This printer is a large, both in the size of the case and in the available printing area, fully enclosed printer, It can make a print up to 280mm wide x 280mm deep x 270mm high. That's about 11 x 11 x 10 5/8 inches. It can print very fast (if you are interested in numbers: it will print at 600mm/second, accelerate at 20,000mm/second squared, and the extruder can process 35 cubic mm/second). It has a clear plastic door and a lift off clear plastic top giving you pretty good visibility of its actions. It is controlled by a 64 bit custom processor board and runs the Klipper operating system. There is a 5 inch touch screen display which allows you to manage the machine directly. It also includes your choice of either a WiFi or Ethernet connection with a computer providing an amazing degree of both monitoring and control. It comes standard with an extra extruder which is set up with a hardened steel nozzle for printing abrasive materials such as carbon fiber re-enforced filaments.
It is based on the core x-y architecture. This mean that there is a pair of Y axis precision ways attached to the main structure, with a set of tubular precision X ways riding on them. On the X ways is the extruder, which is what dispenses the melted plastic. With the lightweight moving parts of the X and Y travels, the machine is mechanically able to move the head very fast. The Z axis is handled by the main table which moves up and down. This is a comparatively heavy assembly, but that has very little to do with printing speed, as the table only moves a few thousandths of an inch at a time, and that is usually only a few times per layer of printing.
Klipper has brought to modern printers a way to print very fast without losing quality by implementing something called "Input Shaping". As part of the initial calibration routine, the head is driven very fast through a range of frequencies. An accelerometer in the head measures all the resonance points of the structure and Klipper will avoid those frequencies during printing. This avoids serious surface defects normally seen when trying to print too fast. It also has other improvements over older systems that are beyond this discussion.
Not everything about this printer is good. There are also some disappointing points: The printer is quite large for its printing volume and very heavy (which is both good and bad), it is very loud during printing due to the many fans running, startup takes a longer time than the Prusa mostly due to a much slower bed leveling routine, and it is much harder to load and unload filament due to its much more protective system of handling it. Other problems or deficiencies are discussed later in this write-up along with their solutions.
Modifications already!
Any time you buy a new fairly complex item there are good features and there are not-so-good ones. This printer is no different. There are a number of areas where you look and say to yourself "Why did they do it that way?" Of course I cannot just let it be when there is an opportunity to improve it! Here are some of the initial modifications I have made to better suit my uses:
Move the filament reel: For some reason Qidi, Creality, and Bambu Labs all decided that the rear of the machine is where the filament reel should be mounted. Almost every review of any of these machines complains about this. If you happen to have it on a table in the middle of the room, this should work OK, but if, like most of us, you need to place the machine against a wall, the rear location makes it almost impossible to change your filament without dragging the printer to a different position.
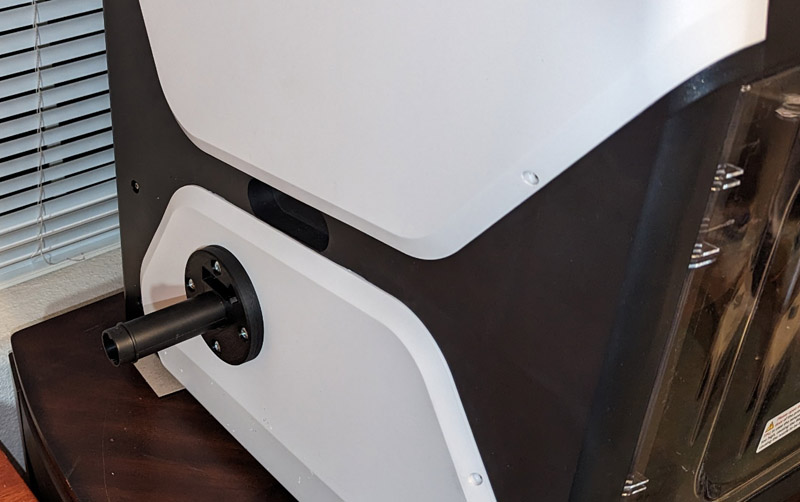
The filament holder mount is a round peg that fits in a rather complex opening on the rear panel, and there is a bayonet type cap that twist locks in the end to secure the reel. One of the first things I did was to take careful measurements of the mounting hole and model it in Fusion 360, my favorite CAD program. I printed a test piece and noted where the fit was slightly too tight or too loose, modified the design and re-printed it. The peg now fit perfectly! I mounted this round peg holder on the left side of the machine and now I can reach everything to change my filament without problem.

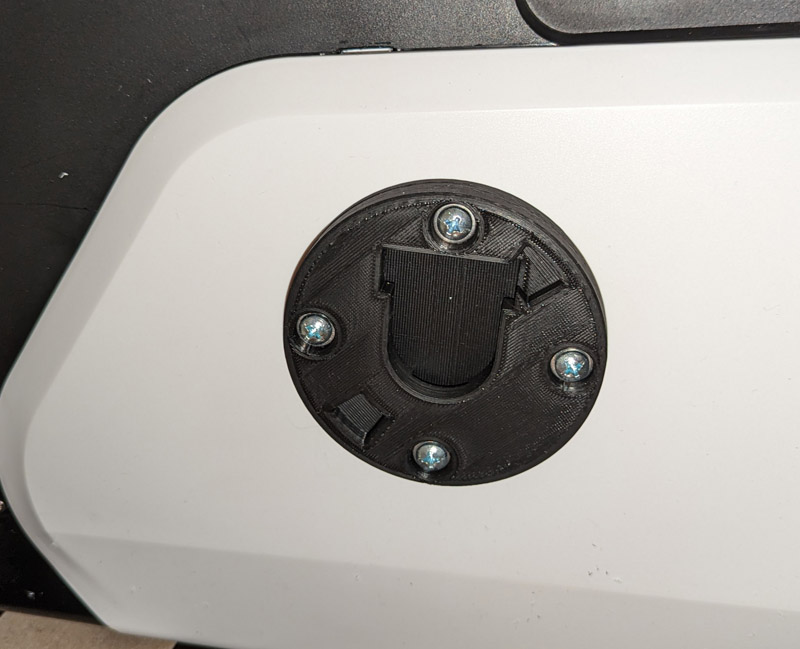
The original mounting location on the back of the machine has a pretty complex shape to duplicate. The center shows my duplicate mounted to the machine.
The right shows the peg inserted in the mount.
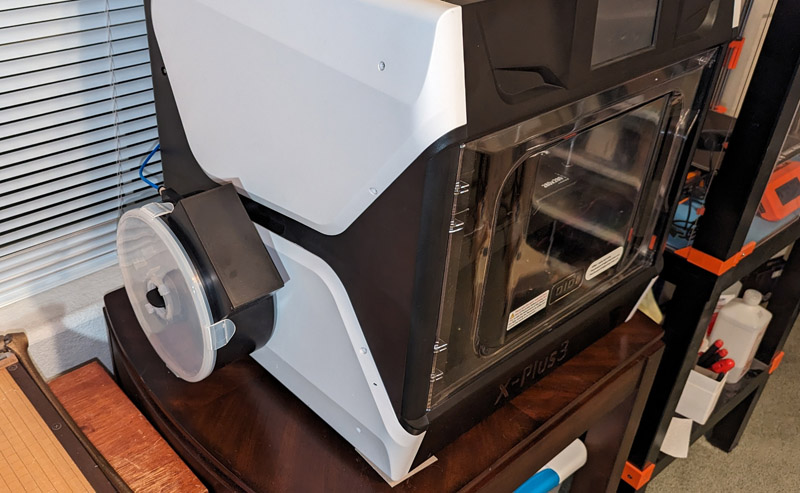
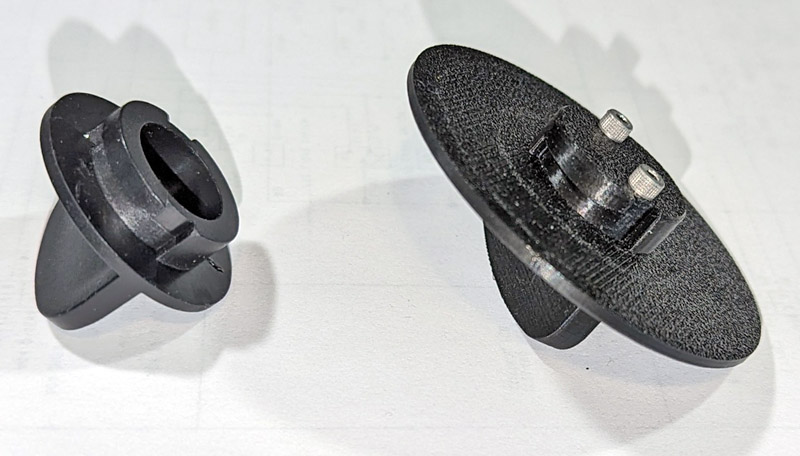
And here is the dry-box mounted where it is accessible. To restrain non critical filaments, I also printed a knob with a larger retaining ring. This
holds the reels in without the dry-box cover. On the right is the original knob and the new one. The original is still needed with the drybox cover.
.
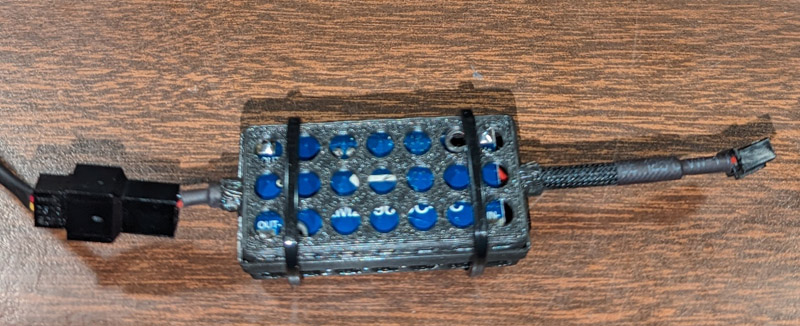
Control board fan: One annoyance I noticed immediately was that whenever the power is on, there are 3 fans running. Each of the two power supplies has a fairly quiet running fan and there is one small fan cooling the main board. This fan did not make just a swishing sound but had a very annoying buzzing, "angry hornet" sound due to its high speed. I had a similar problem on a security DVR some time ago, and replaced the fan with a Noctua "silent" fan, which totally cured the problem. I did the same thing here and after solving one significant problem had a very quiet machine during idle.
The problem was that the original fan is a 24 volt fan. Noctua does not make this size fan in a 24 volt model, but does make a 12 volt version. I purchased that fan and wired in a buck converter. This is a device that efficiently reduces the voltage. I could have just used a series resistor, but this would waste half the power supplied to it and add heat to the chamber I am trying to cool. Noctua does make a ready-to-use buck converter cable for this exact purpose, but I did not want to spend their price when it was so easy to do it myself.
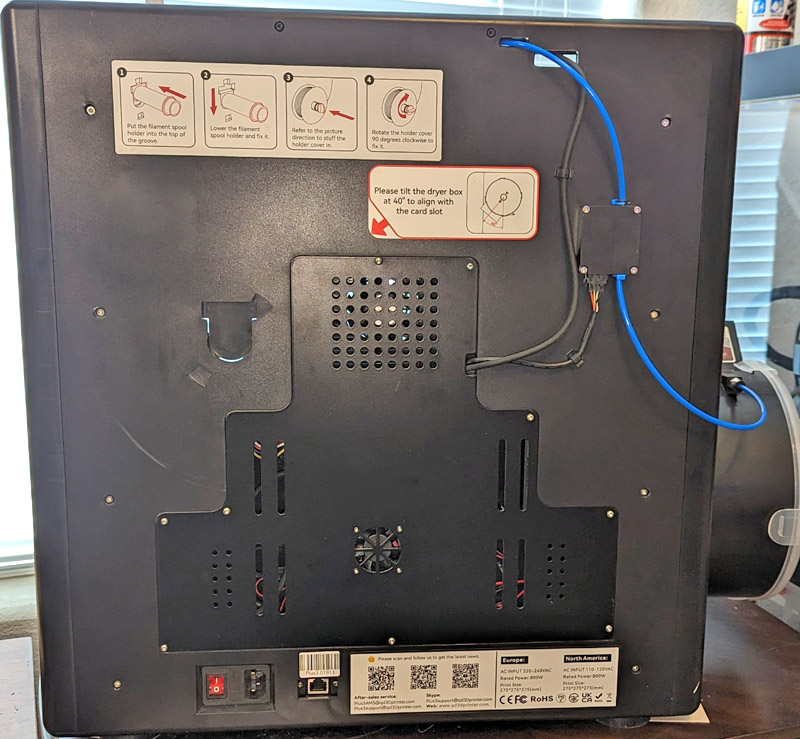
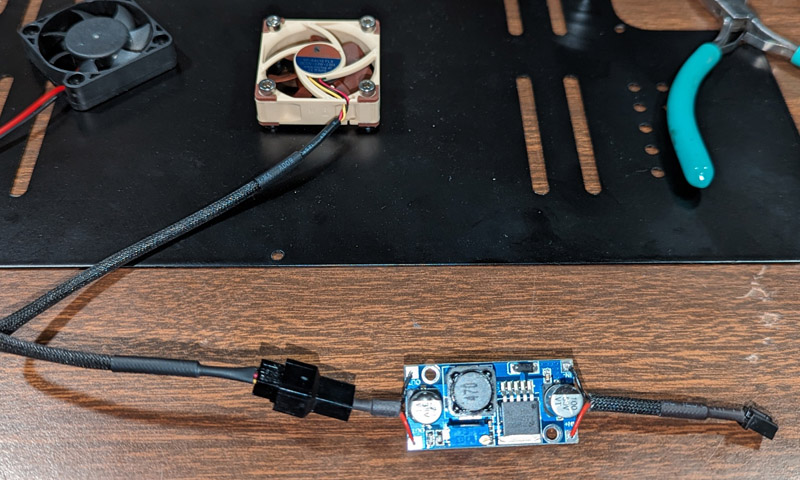
The offending fan is the one near the bottom center as show on the machine rear view. The center shows the buck converter wired into the fan wire. As
this is not firmly mounted, I printed a simple cover to protect it and its surroundings.
I occasionally use small brass threaded inserts in my 3D printed parts where I expect to put screws in and out multiple times. They just mold themselves into holes when slowly pressed in with a hot soldering iron. I wondered if I could do the same thing with the plastic of the printer's rear wall. I have no idea what plastic they used, but I figured it was likely ABS. Fortunately I have a small scrap crescent shaped piece which was removed when I enlarged the hole for the charcoal filter (see below). I drilled a pilot hole, put in a special soldering iron tip I made for installing inserts, set the iron's temperature to about 20 degrees C. above the suggested ABS printing temperature and the insert installed beautifully.
I did note one difficulty: The wall of plastic is almost exactly as thick as the knurled portion of the inserts. As I pressed the hot inserts into the thin plate, once it was all the way in place, it became much easier to move. The tendency was for the insert to suddenly speed up and go too far into (or through) the plastic. Usually I install these into holes much deeper than the insert length, so there is no tendency to pop out the other side. As some of the holes in my printer go all the way through the wall, and others into a solid boss, I need a tool!
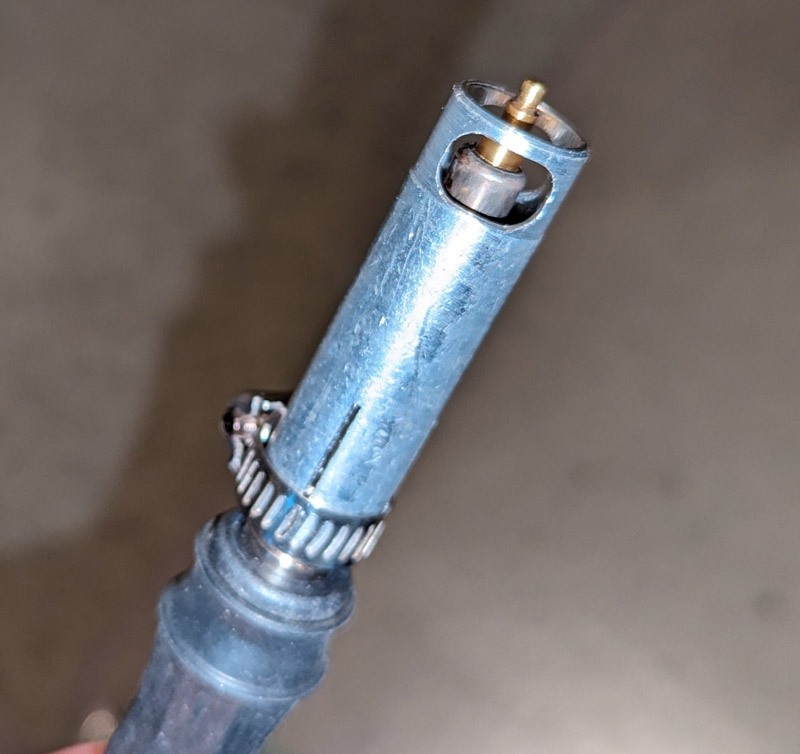
I found a length of thin walled tubing the perfect size to clamp on a knurled nut on my soldering iron. I cut it to length, put a couple holes near the end for visibility, slotted the other end, and I had my tool. I can adjust the position in and out and use a small hose clamp to hold it in position. By just pressing it against the wall, it places all the inserts the exact same depth into the plastic.
I proceeded to drill out all the holes in my printer to the correct size for the inserts and without problems, installed all the inserts. I now don't need to worry about stripping any more of the wood screw holes!
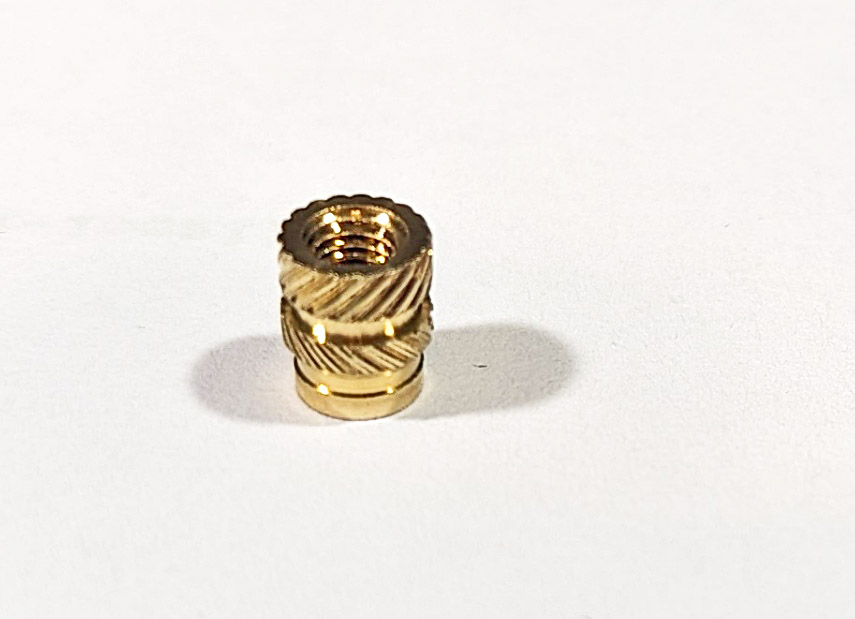
This is one of the heat-set inserts. It is threaded for 3mm screws and stands a little under 1/4 inch high.
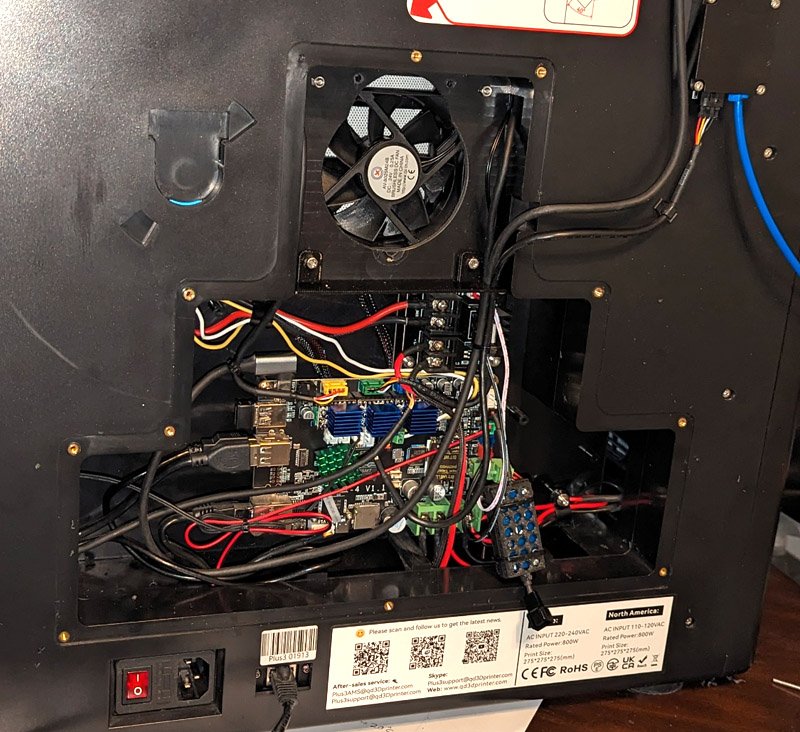
The tool allows me to install the inserts very accurately, and prevents me from pressing them in too far. The steel plate now has some secure threads to hold it. The main
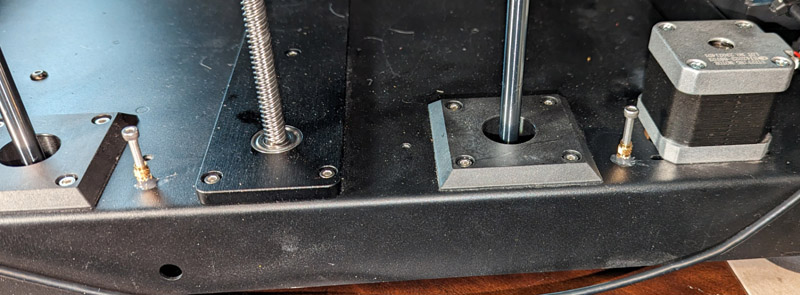
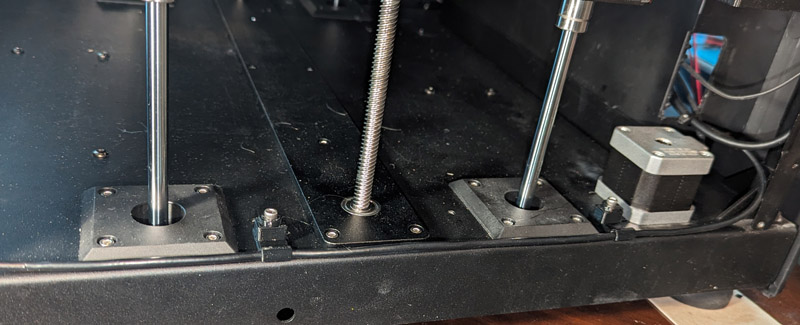
control board lives behind the plate. Cable management was not very high on their list!
Activated charcoal filter: The spec sheet for the larger model of the Qidi printer shows that it contains an activated charcoal filter to minimize the nasty fumes of some materials. The X-Plus 3 specs did not list this filter. I contacted Qidi support prior to my final purchase decision to ask about this and how bad the fumes were without it. I quickly received a reply stating that the Plus model now included the filter and that it handled these fumes well. Upon receiving the printer, it was obvious that there was no filter. I again contacted their support and with apologies was told that this was an upcoming change which had not started shipping yet. In the ensuing exchange of emails, I asked if it would be possible to obtain the parts for the filter and install them myself. After checking she said that was impossible, but that she would see about getting me drawings of it. She then offered me a very generous partial refund to compensate me for my problems and the missing part I was told I would get. I received this refund almost immediately.
I figured this topic was now complete and researched alternate solutions. I was then contacted by the same support lady stating that she had talked to the technical people about getting me a drawing and they had suggested just sending me the parts instead - which they did! I now had my parts and the refund - Wow!
Having no information on the filter, I examined all the possible mounting locations and realized that it was planned to replace an existing vent fan. Installing the filter was simple in principle, but not so much in practice. First I had to open the existing hole in the rear panel of the printer from the smaller fan size to a larger one to match the filter. I also had to accurately position 4 mounting holes to match the pattern on the rear of the filter. To open the hole, I planed to use a hole saw of the correct diameter, but the center pilot which must be well guided fell into the open fan hole. I decided to solve both these problems by 3D printing a special combination drill jig and center-pin-guide.
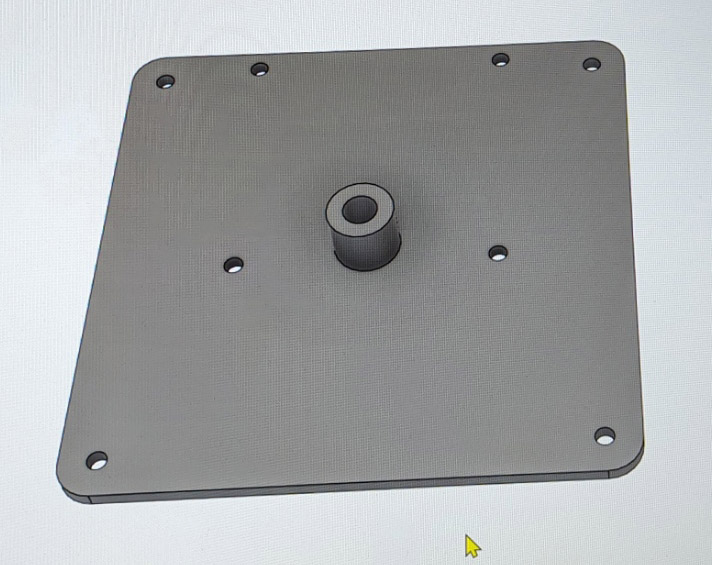
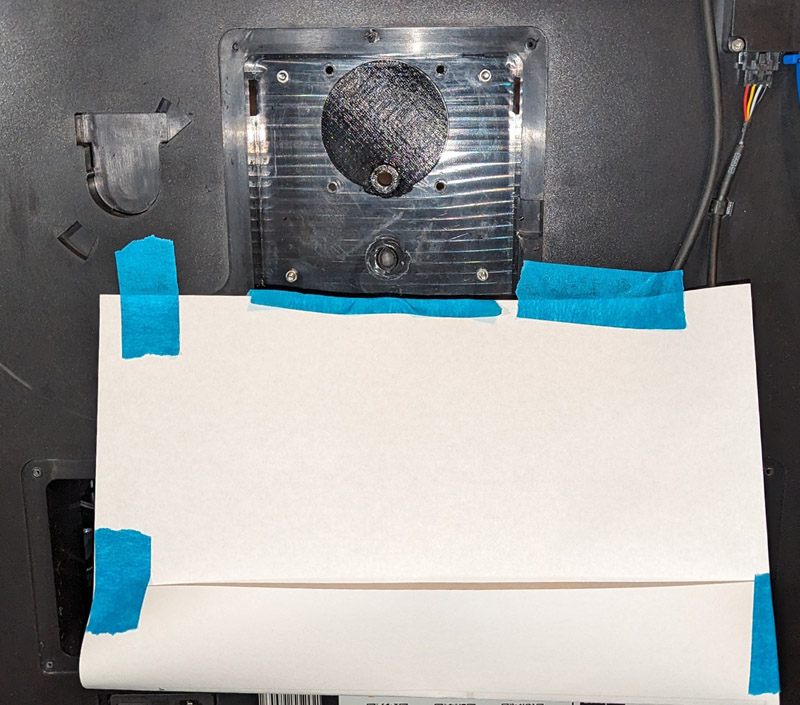
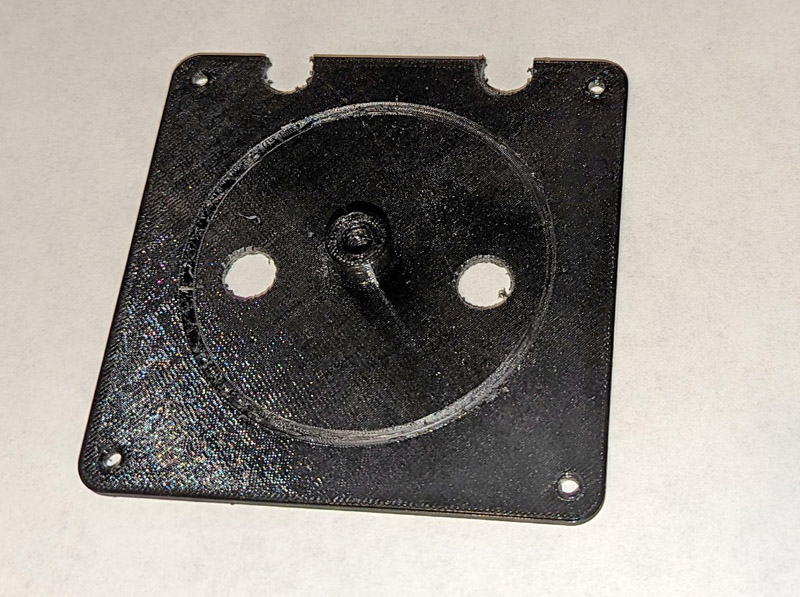
The left shows the jig as I printed it. Shown here from my CAD program as I have no photo at that stage. The smaller square pattern of holes fits the
existing fan mounting, the large pattern fits the new filter. The boss and hole in the center are to guide the hole saw.
Initially the jig was fastened on the near side using the small pattern of holes. Using the large pattern as a drill guide, I drilled the back panel holes. Then I removed the jig,
enlarged the holes in the small pattern to clear raised bosses on the opposite side and mounted it on the opposite side using the large hole pattern. I now had a sturdy
support for the center pin of the hole saw. The center picture shows the mounted jig ready to cut the larger hole, along with a makeshift chip catcher.
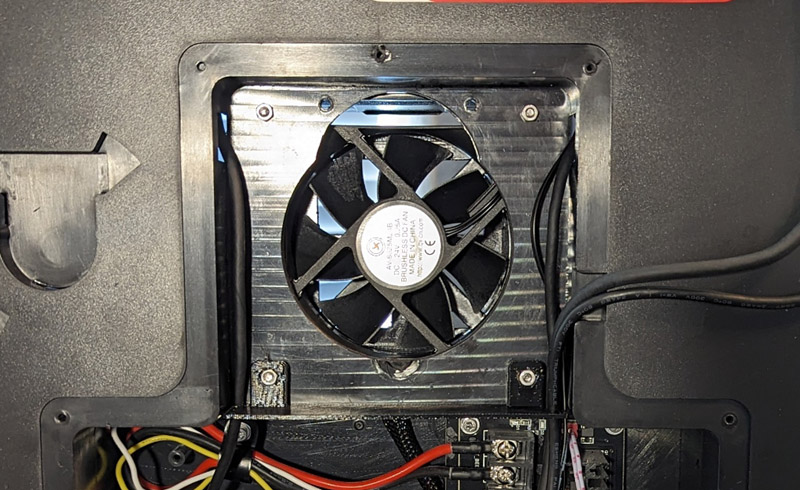
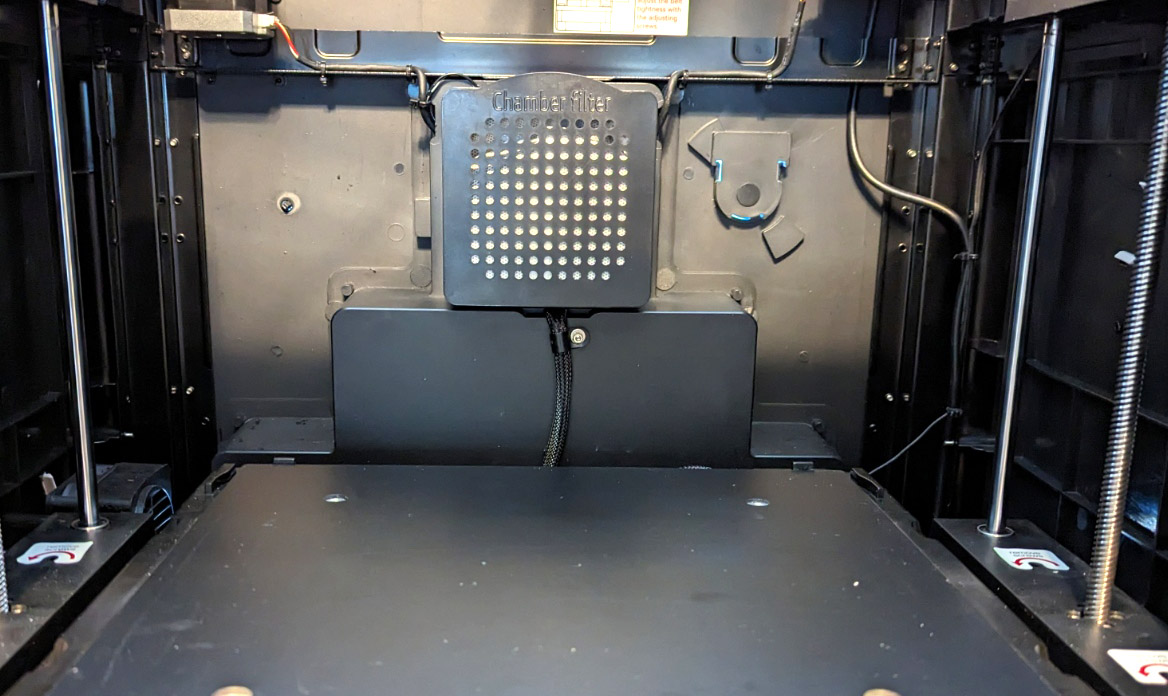
Next, using the hole saw, the large hole was cut with results as shown on the left with the filter in place. The right shows the filter from the inside. The fan wiring
was already the correct length to plug into the same connector as the previous vent fan.
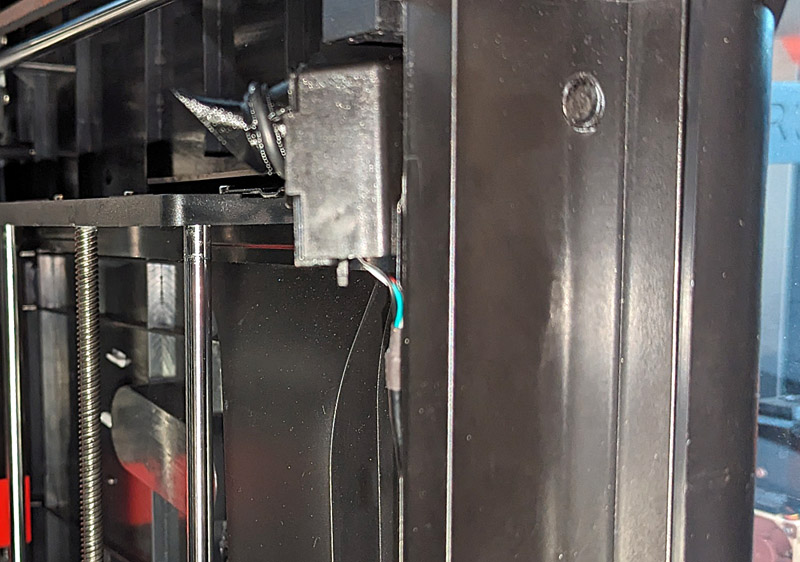
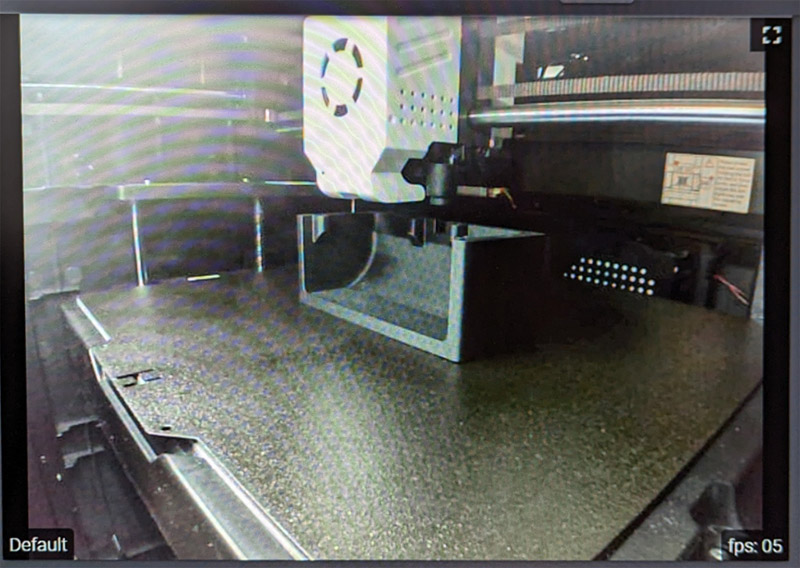
One day I received an email from Qidi offering their brand new camera at a reduced introductory price. I ordered it and when it arrived, installed it. It fastened to one of the frame members with a couple thumb screws. The wire was run using a path shown in their accompanying instructions and plugged into an open USB port on the control board. Activating the camera in their software produced a live image of the printing in process.
This worked quite well, except there was excessive glare due to the chamber lights shining directly on the lens. This effect was mostly on the far wall of the chamber and did not seem to affect the print area very much, but it was certainly annoying. I printed a number of different lens shades for the camera, but was unable to size any exactly so that it would block the LED light from the lens without reducing the view of the camera. The very wide field of view of the camera, and the 12 inch length of the LED strip made it very difficult to get an effective shade.
Stepping back and reviewing the problem, I decided that I would likely be more successful blocking the light at the lights themselves rather than trying it at the camera. I printed a strip that mounted to a metal edge below the LEDs and shaded any light hitting the very front of the enclosure cavity. The rest of the area gets full light as before. This seemed to effectively keep any of the light from striking the camera lens. I did end up putting a small shield on the camera to protect the very exposed lens from other miscellaneous stray light.

I tried a number of different types and sizes of hoods, but all either allow enough light to hit the lens to cause glare, or actually blocked part of the image.
The camera mounts just inside the door, near the top. It is shown here with the small lens shade.

Putting the light baffle under the LEDs really made a difference! Left is before, right is after. The glare is totally gone.
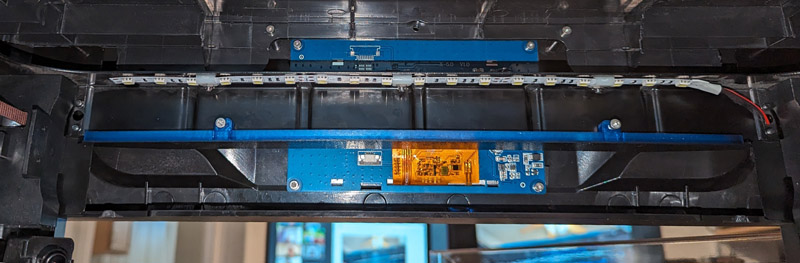
The light baffle solved the glare problem. The baffle is the long horizontal blue strip above the door opening. It
shades the light from shining on anything in front of the build plate. When I decided to print this in ABS I did not
realize the only ABS I have (Blue ABS) was translucent until I opened it. This let a lot of blue light through, so I
painted the bottom black. This was the first time I ever printed ABS, the Qidi did it perfectly! And the new
filter kept it from smelling!
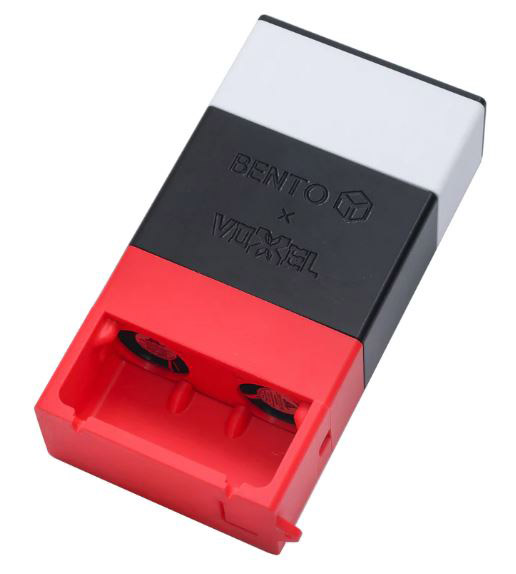
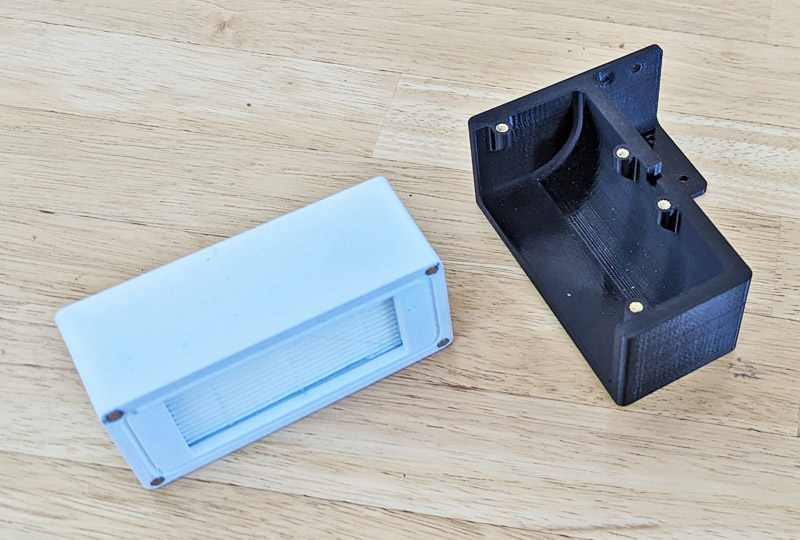
The Bento Box: As a result of my research into alternate solutions for the carbon filter, I had already ordered an after-market filter unit by the time I found they were sending me the Qidi version. The Bento Box was originally designed to fit the Bambu printer, and includes both a HEPA filter and activated charcoal. As the Qidi uses only charcoal to filter air leaving the chamber, and the Bento Box is a recirculating unit with both types of filters, I decided to use them both!
The Bento Box was designed by a user named thrutheframe. It is available for any non-commercial entity to download the files and print it themselves for no cost. He teamed up with a company, VoxelPLA in the USA (and others abroad) to offer a complete kit including all the printed parts, the fans, the filter, the activated charcoal, and the needed hardware for $35. For that price, I ordered their kit. After chasing down the various pieces and filter media, then printing the parts, I would not have saved very much, and spent a lot of time.
I was puzzled by the name "Bento Box", so I asked Mr. Google about it. He replied "A bento box is a Japanese-style, single-serving, reusable lunch box. It contains multiple compartments that keep the food separate and fresh." Then it made sense! This Bento Box is a multi compartment box which keeps the various functions separate. The top section contains a HEPA filter, the next one contains the activated carbon. Below that is the fan section which then pushes the air out the bottom duct. The two filter sections and the cover to the HEPA section all attach with magnets for easy servicing. Inside the charcoal section is a separate 3 compartment box with its own lid to hold the activated carbon pellets, which then just drops into the center compartment. In operation, air is pulled into the top, passed through the HEPA filter, then the activated carbon, through the fans and out the bottom. It is a very nice design!
The Bento Box is made of several sections. From the top is a grill/cover then the HEPA filter. They attach to the charcoal
section which attaches to the fan section. It and the bottom duct are screwed together and they are what is hard mounted
to the printer. The two filter sections and the top grill all attach using magnets and are accurately aligned and sealed with
a raised track and matching groove on the opposite surfaces.. Overall the unit is about 2 inches deep, 4 1/4 wide and
8 1/2 tall. It came with two bottom ducts providing mounting provisions for both the Bambu and the Voron series of printers.
I am very pleased with the filter unit, but as expected, it did not fit! I had figured that somehow I would need to reduce the height of the filter by about 1/2 inch, but waited for receipt of the unit to figure how. I need to redesign the mounting provisions for the bottom duct anyway, so decided to take about 1/2 the reduction in that part. The remainder could come from the HEPA section quite readily. As the files available to me are suitable for printing, but difficult to do any serious editing, I re-modeled both sections from scratch in my CAD program, carefully measuring everything about the pieces I had. Then I modified the 2 parts to meet my needs. This latter part was now quite straight forward. After reprinting the two sections, and installing the magnets, everything fit just fine and the sections snapped together and lifted apart as designed.
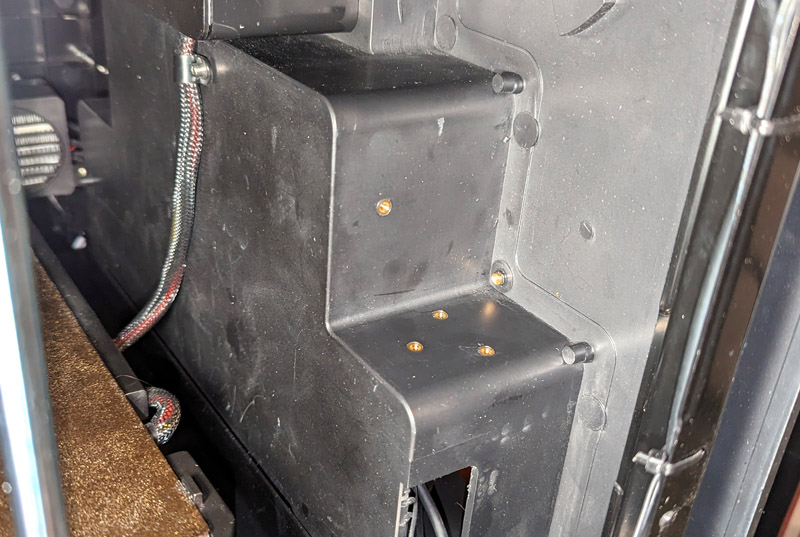
To obtain the needed access to the right rear corner of the machine, I removed the right side panel.
These are the two sections I modified and reprinted.
The only place I could really mount the unit was near the rear wall at the very right edge of the printer. After reducing the height, it just barely fit here. I decided to make an angle extension on the back side to mount it. The installed unit sits about 1/3 on the step in the rear wall and hangs out the other 2/3's with the mounting angle extending behind it to secure it in place. It clears the table path by about 1/4 inch.
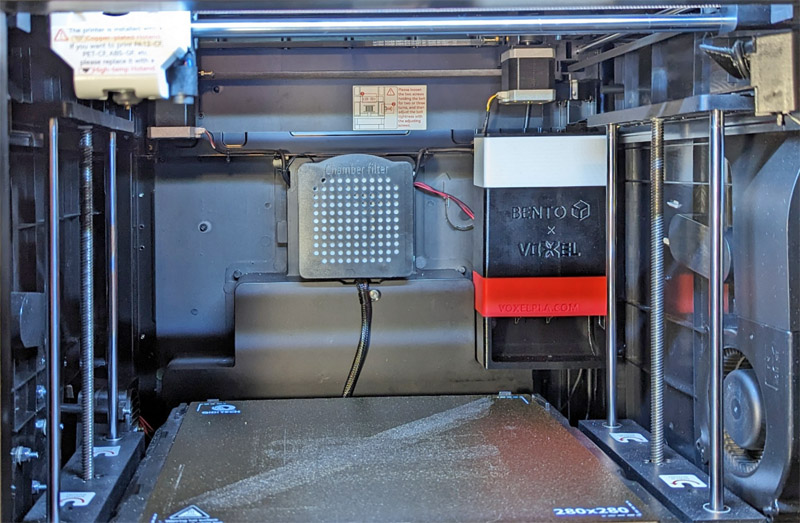
Now that I am an "expert" using inserts, I placed 4 of them where needed to mount the unit. On the right is the mounted filter.
While I had the side panel off I decided to secure the camera cable which was laying loose along the edge. I initially
was going to use a couple empty threaded holes in the base until I realized they were for the shipping hold-down
screws. Instead I just JB Weld epoxied 2 inserts to the base and designed my wire clips to fit over them.
Now the wire is much neater and secure.
Addendum of 12/20/23:
The new EMMC arrived somewhat later than predicted. When I ordered the larger one, the instructions on the website gave explicit directions to first use an included adapter, plug that into your PC using a standard SD card adapter, and flash a basic operating system onto the card. Then to install it into the Qidi printer and update it to the latest version.
I went back to that webpage to follow those instructions only to find a note that now all EMMC's are factory programmed and should just be directly installed in the printer. I took the chance that mine was included in this note and installed it into the printer. Upon powering up the printer, it immediately went into a fairly lengthy update process. When complete, my printer booted into the latest firmware, and looking up my storage values showed about 20 times the available storage as I had previously!
Conclusions:
I am quite happy with the Qidi printer so far. It is very fast, it prints quite well, it has the capability to print advanced filament types, and it was fairly priced. Of course, anything you buy will have it pros and its cons. I believe I have corrected most of the cons with the above steps, and as I discover additional ones I shall attack them also.
Even though the Qidi has all the above advantages, I still consider my Prusa to be my main printer. For small "quick" jobs it is more convenient, the filament is easier to load, the startup is much quicker than the Qidi, mainly the bed leveling which is very quick on the Prusa but excruciatingly slow on the Qidi. Once printing, the Qidi is much faster, but this stage is where you can walk away and do something different. I am really happy to now have this choice when I 3D print!
Addendum of 12/15/23:
Well, I ended up with the best of both worlds! The black Friday sale Prusa offered on the new MK4 printers and kits was just too good for me to pass by! I ordered a kit early on that Friday and it arrived on December 15. I spent two leisurely days building it, interspersed with a couple Christmas activities. It is a great printer! It is considerably faster than the MK3S (which sold quickly on Craigslist), but it is not as fast as the Qidi. It has many wonderful features such as a bed leveling system which accurately sets the 1st layer height, regardless of the build plate thickness or material, a more powerful processor, a color display unit, WiFi and Ethernet connections, Input Shaping, a much better extruder, and much more. I am thrilled to have been able to get it!
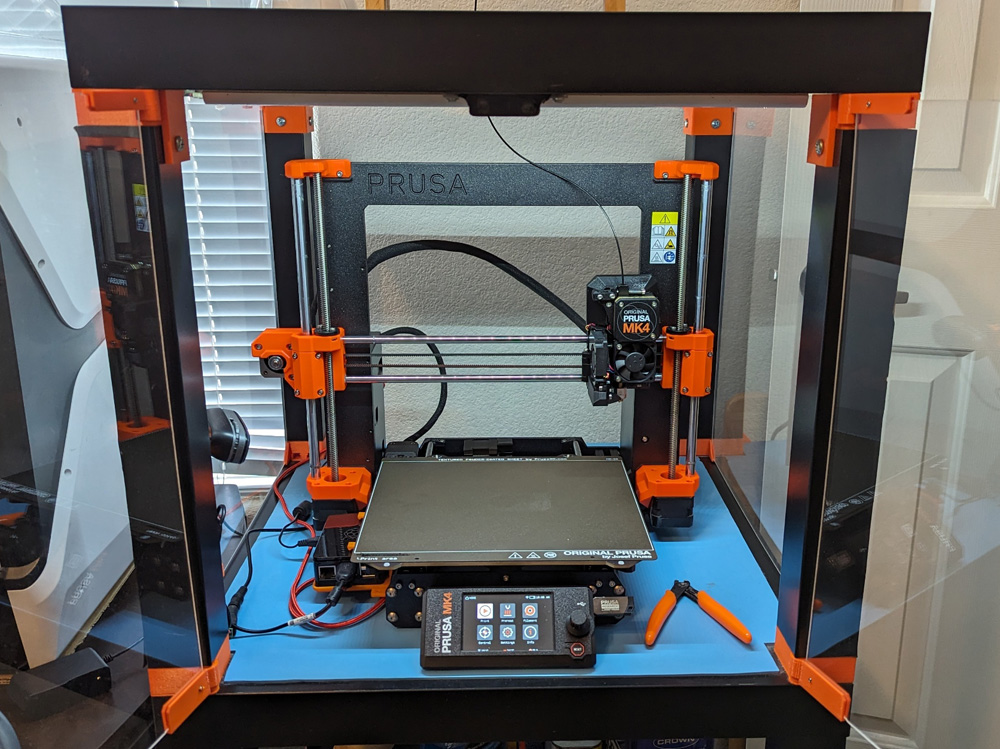
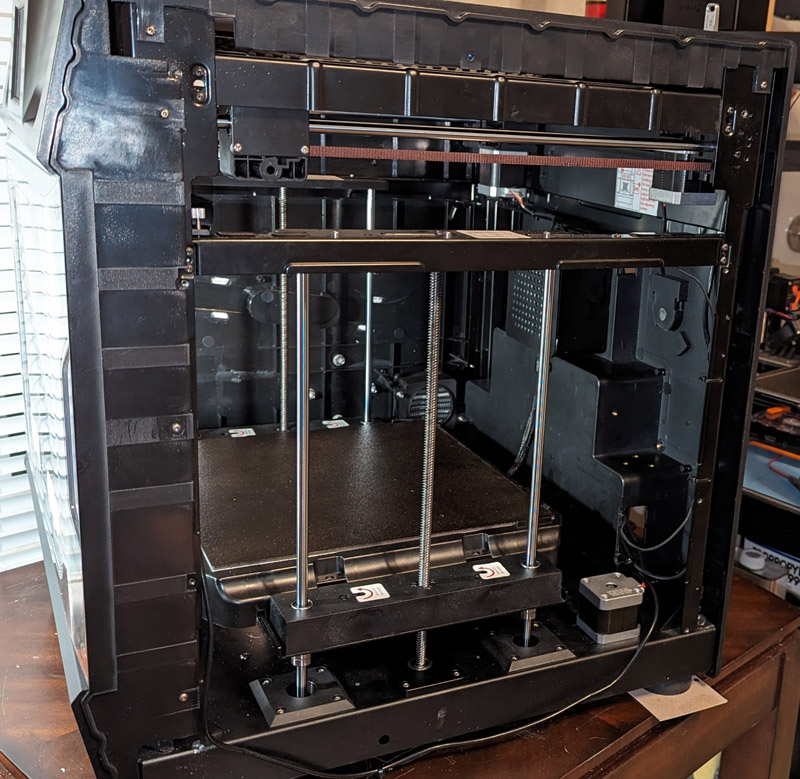
My new Prusa MK4 printer is another wonderful upgrade to my 3D printing capabilities!
It fits in my enclosure just as easily as my model MK3S did.
This gives me two excellent printers which complement each other. The Prusa will be my primary printer and my Qidi will handle the more exotic materials which require a heated chamber, hazardous fume control, or a hardened nozzle.
I am very well pleased with both!
GO BACK
R. S. Mason October 2023